Canadian Passport Photos: What Triggers Government Rejections and How to Fix Them
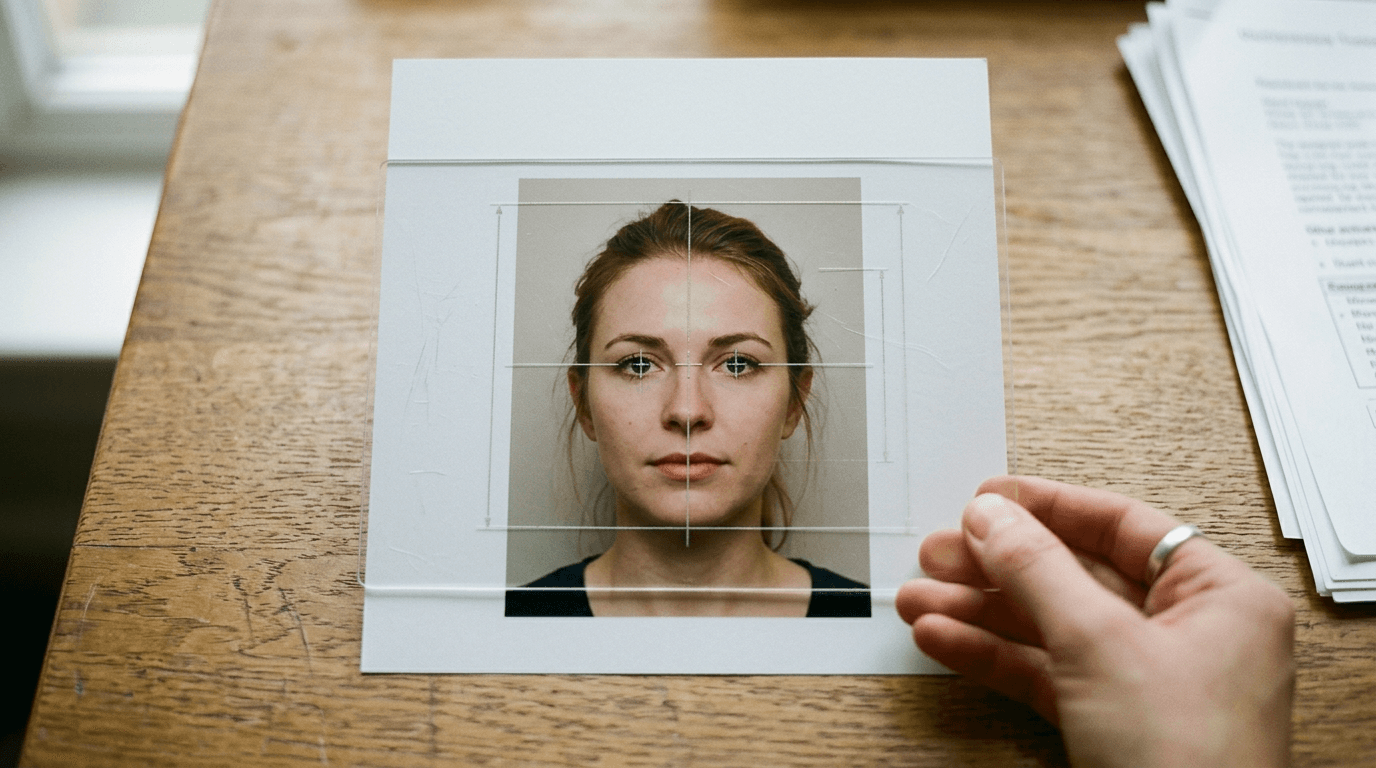
You hand the sealed envelope to the receiving agent at Service Canada, and they pull out their rigid plastic overlay template. They center the crosshairs over the bridge of the nose on your printed image, check the chin-to-crown measurement against the printed lines, and slide the application back across the desk. The issue is a faint shadow falling behind the left ear. Getting canadian passport photos accepted is less about looking like yourself and entirely about satisfying an unforgiving biometric template. The Canadian government rejects thousands of applications every month purely over lighting, background gradients, and millimeter-level sizing errors that humans barely register but scanning software flags instantly.
Quick Summary
A Canadian passport photograph is a strictly formatted 50 mm by 70 mm biometric image that requires neutral lighting, a pure white or light-colored background, and specific facial proportions. Meeting these physical specifications requires understanding the exact tolerances the government processing system applies before an application can proceed.
- Required physical dimensions are exactly 50 mm wide by 70 mm high.
- Facial height from chin to crown must fall exactly between 31 mm and 36 mm.
- The back of one physical photo requires the photographer's details, date, and a guarantor's signature.
- Digital manipulation of facial features or skin texture results in automatic rejection.
Table of Contents
- Why the Canadian standard catches applicants off guard
- Where home lighting ruins government compliance
- How infant applications break standard studio setups
- What the guarantor signature actually verifies
- Comparison of passport photo processing methods
- When to trust a digital template for retail printing
- FAQ
- Recommended Reads
Why the Canadian standard catches applicants off guard
Most global passport systems rely on a standard two-by-two-inch square format. Canada diverges sharply from this norm, requiring a portrait-oriented photograph measuring 50 mm by 70 mm (approximately 2 inches by 2.75 inches). This taller aspect ratio is not an arbitrary design choice; it is engineered to provide sufficient negative space around the head for the government's biometric scanning software to map the shoulders and neck alignment.

If you attempt to use a standard cropping tool designed for other countries, the image will fail the Canadian test instantly. For instance, comparing the format against the specifications outlined in the United States Baby Passport Photo Guide reveals that a US crop leaves almost no room above the head, whereas the Canadian standard demands significant vertical clearance. The Canadian facial height requirement - measured from the tip of the chin to the natural top of the head - must sit rigidly between 31 mm and 36 mm.
This narrow 5-millimeter window is where most DIY attempts fail. If the face measures 30.5 mm, the biometric software cannot establish a reliable baseline for the distance between the pupils. Furthermore, the government mandates that the image remains entirely unedited regarding the subject. You cannot use software to airbrush a blemish, remove red-eye, or smooth skin texture. The biometric readers are calibrated to detect the pixel blurring that occurs during digital retouching. When the software detects a patch of skin with abnormally uniform pixel density, it flags the image as digitally altered, triggering a manual review and almost certain rejection.
Where home lighting ruins government compliance
Taking a canada passport photo at home often fails because modern smartphone cameras are fundamentally designed to alter reality. By default, smartphones apply High Dynamic Range (HDR) processing, artificially lightening shadows and darkening highlights to create a flattering, balanced image. Under Canadian passport regulations, HDR processing is considered illegal digital alteration because it flattens the natural contours of the face.
Service Canada scanners rely on directional shadow depth to verify the three-dimensional structure of the applicant's face. The system maps the pixel contrast between the bridge of the nose and the cheekbones. However, if you rely on a single overhead light in your living room, you create a sharp "butterfly shadow" directly under the nose and chin. If you stand next to a window, you create a gradient where one half of the face is brightly illuminated and the other falls into shadow. Both scenarios trick the facial recognition software into miscalculating the depth and distance of facial features.
Practical rule: To achieve compliant flat lighting without studio strobes, position the subject directly facing a large window on an overcast day, turning all interior artificial lights off to prevent mixed color temperatures from casting yellow or blue hues on the skin.
Background lighting is equally dangerous. A wall painted pure white will often photograph as pale grey or yellow depending on the distance between the subject and the wall. If the subject stands too close, they cast a harsh drop-shadow directly behind their shoulders. The Canadian specification explicitly requires a plain white or light-colored background with high contrast against the subject's hair and skin, entirely free of shadows or texture.
How infant applications break standard studio setups
Commercial photography studios are built for cooperative adults who can sit upright on a stool and look directly into a lens. Infants cannot support their own necks, let alone hold a neutral expression while heavy strobe lights flash in their eyes. Consequently, many retail pharmacies and local studios outright refuse to photograph infants under twelve months old, leaving parents scrambling for a solution.
The requirements for an infant Canadian passport photo are nearly identical to those for an adult, with one critical concession: newborns are permitted to have their mouths slightly open. However, their eyes must still be open and clearly visible, they must face squarely toward the camera, and no hands - neither the child's nor the parent's - can appear in the frame.
To achieve this without studio equipment, the standard mechanism involves laying the baby flat on their back over a plain white sheet or blanket, often placed inside a car seat or bassinet to provide structural support. The parent photographs the child from directly above. This approach creates a new set of compliance problems: the white sheet is invariably wrinkled, creating textural shadows in the background that the government will reject.
This specific failure mode is why specialized digital processing tools exist. Instead of attempting to artificially blur the sheet - which would violate the non-alteration rule - compliant AI systems extract the unedited subject entirely and drop them onto a mathematically pure white background layer, ensuring the facial height scales precisely to the 31-36 mm requirement. For detailed walkthroughs on setting up this exact overhead shot, the Canada Baby Passport Photo Guide outlines the physical positioning required before the software takes over.
What the guarantor signature actually verifies
Unlike systems that have moved entirely to digital uploads, most Canadian applications still demand two identical, unedited physical prints. The reverse side of one of these prints carries a severe administrative burden. It must feature the name and complete address of the photographer or studio, the exact date the photograph was taken, and the written declaration of a qualified guarantor.
The guarantor must write: "I certify this to be a true likeness of [Applicant's Name]" and sign the back of the photo. This physical requirement introduces a mechanical failure mode: ink transfer. If a guarantor uses a heavy ballpoint pen and presses down firmly, the indentation presses through the thin photo paper and creates raised ridges across the applicant's face on the front of the image. The scanning software reads these ridges as facial scars or digital artifacts and rejects the photo. Conversely, if the guarantor uses a slow-drying gel pen, stacking the two photos on top of each other before placing them in the envelope will transfer wet ink onto the face of the second photo, ruining both.
When producing a passport size photo in Canada using a digital processing service and printing it at a local retail pharmacy, the "studio" details refer to the commercial entity that processed or printed the image. Some software systems generate a compliance block - a digitally stamped grid containing the required studio name and address - that prints directly alongside or on the back of the photo sheet, leaving only the date and guarantor signature to be filled in by hand.
Comparison of passport photo processing methods
Understanding how different processing methods handle biometric requirements clarifies why certain applications fail while others proceed seamlessly.
| Processing Method | Lighting & Background Control | Sizing Accuracy (31-36 mm) | Infant Viability | Guarantor Stamp Handling |
|---|---|---|---|---|
| Retail Pharmacy / Post Office | Poor (relies on ambient store lighting and pull-down screens) | Moderate (manual cropping by untrained staff) | Very Low (most refuse infants entirely) | Included (physical ink stamp applied in store) |
| DIY Mobile (No Software) | Poor (smartphone HDR alters skin tone, home backgrounds have shadows) | Low (guessing dimensions during printing causes millimeter errors) | Moderate (easier to pose, but impossible to remove sheet wrinkles) | None (must handwrite all studio details) |
| AI-Processed Digital | High (automatically replaces background, normalizes exposure) | Exact (algorithmically scales face to exact millimeter tolerances) | High (extracts subject from difficult poses) | Digital Block (generates printable studio detail block) |
When to trust a digital template for retail printing
If you process your image digitally and take the file to a retail kiosk (like Walgreens, CVS, or a local photo lab) to print the physical copies, you introduce the final and most common point of failure: printer scaling.
A standard retail photo sheet measures 4 by 6 inches (101.6 mm by 152.4 mm). A compliant digital template will place exactly two 50 mm by 70 mm passport photos side-by-side on this 4x6 canvas, leaving a small white border around the edges. This mathematical layout only works if the printer outputs the file at exactly 100% scale at 300 Dots Per Inch (DPI).
However, most retail printing kiosks have a setting called "Fit to Page" or "Borderless Printing" enabled by default. This setting takes the 4x6 image file and stretches it by roughly 2% to 3% so the ink bleeds all the way off the edge of the paper. That 3% stretch is catastrophic for a biometric document. It takes a perfectly compliant 31 mm face and stretches it to 32 mm, altering the horizontal distance between the eyes in the process. When Service Canada receives the stretched print, the proportions no longer match the geometric rules of a human face.
Practical rule: Always select "Print at Original Size" or disable "Borderless Printing" at the retail kiosk. Measure the printed photo with a physical ruler before leaving the store; the box containing your head must measure exactly 50 mm across and 70 mm down.
Because of the tight tolerances involved in both the digital processing and the physical printing, securing compliance without a safety net is risky. Reputable digital systems recognize these mechanical failure points and back their processing algorithms with a 100% Refund Policy if the government rejects the printed image, provided you follow the precise printing instructions. If you encounter errors navigating kiosk menus or understanding the guarantor requirements, checking the Help Center of the tool you used is often faster than trying to contact a government hotline.
FAQ
Can I smile in a Canadian passport photo?
No. The Canadian government strictly requires a neutral facial expression. Smiling alters the physical shape of your cheeks and the distance between your facial features, which prevents the biometric software from creating an accurate map of your face. Your mouth must be completely closed.
Do my ears have to be visible?
While the Canadian standard does not explicitly demand that your ears are visible, it is highly recommended. Hair must be tucked behind the ears if it obscures the edges of the face, as the software needs to map the entire width of your jawline and cheekbones.
Can I wear glasses in the photo?
No. Even if you wear prescription glasses every day, you must remove them for a Canadian passport photo. Glare on the lenses, shadows cast by the frames, and the frames themselves obscure critical biometric data points around the eyes.
How strict are the infant photo rules compared to adults?
The facial measurements (31 mm to 36 mm) and lighting requirements are exactly the same. The only leniency granted to infants (particularly newborns) is that their mouths are permitted to be slightly open, and a pure white blanket or sheet is acceptable as a background provided there are no heavy wrinkles or shadows.