How to Format Your US Visa Passport Photo Size in 2026
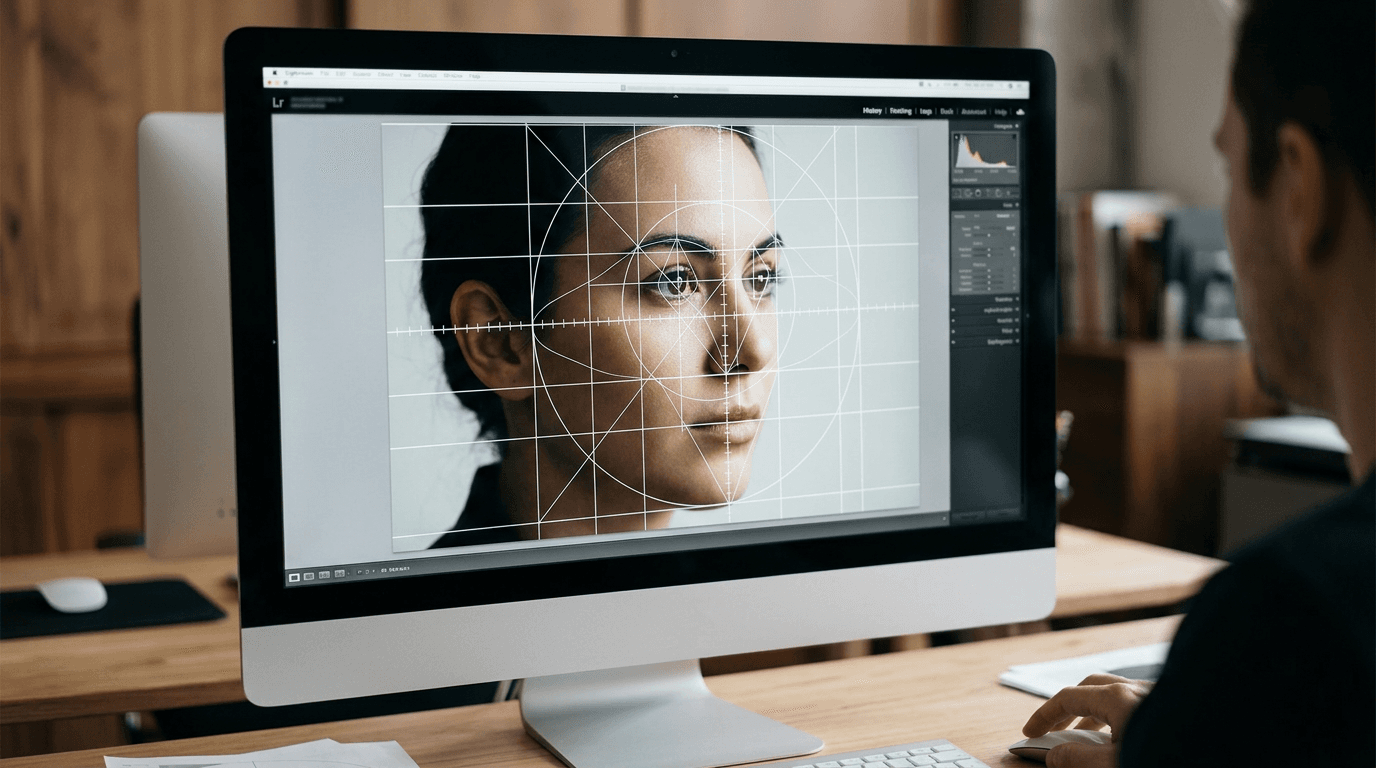
The most expensive mistake applicants make with immigration paperwork is assuming that a photo printed by a local pharmacy kiosk automatically passes the Department of State's online validator. It rarely does. A physical print might look fine to the naked eye, but digital immigration portals scan for specific biometric markers, background compression artifacts, and pixel ratios before a human consular officer ever sees your file. Achieving the correct us visa passport photo size requires precision; getting the digital formatting right the first time prevents automatic portal rejections, prevents you from losing your application fee, and avoids weeks of processing delays.
Quick Summary
Securing a compliant photograph for US immigration requires adhering to strict biometric parameters set by the Department of State and USCIS. This means matching exact physical dimensions, digital pixel counts, and head-size ratios while eliminating shadows, background textures, or digital alterations that trigger automatic rejection algorithms.
- Physical prints must measure exactly 2 x 2 inches (51 x 51 mm).
- Digital files require a minimum resolution of 600 x 600 pixels and a maximum of 1200 x 1200 pixels.
- The subject's head must measure between 1 and 1 3/8 inches (25 to 35 mm) from chin to crown.
- The image must be saved in the sRGB color space and compressed to a maximum file size of 240 kB.
Table of Contents
- 1. Establish Your File Output and Validation Framework
- 2. Align Subject Framing with Biometric Nodal Points
- 3. Execute the Exact Dimensional Crop
- 4. Control Lighting Geometry and Background Separation
- 5. Manage File Compression and the Printing Handoff
- Common Pitfalls & Troubleshooting
- FAQ
- Recommended Reads
1. Establish Your File Output and Validation Framework
The US immigration system operates on a dual-track process. Depending on your specific form - such as the DS-160 for nonimmigrant visas, the Diversity Visa program, or the I-485 for adjustment of status - you will need either a raw digital JPEG file, physical photo prints, or both. Understanding your target format before you turn on a camera dictates how you will light, capture, and eventually save the image.
The official us passport digital photo requirements mandate a perfectly square aspect ratio. The file requires the sRGB color space. It must stay under 240 kilobytes. If your application process requires a digital upload, the Department of State’s Smart Photo Tool will read the file's EXIF data. It scans for compression quality before accepting it. Starting the process by scanning a physical print ruins the digital file's pixel integrity. Conversely, if you over-compress a digital file to meet the tight kilobyte limit, the physical version will pixelate heavily when transferred to photographic paper at 300 dots per inch (DPI).
The mechanical reality is that digital validators look for unadulterated 24-bit color depth. If you shoot a photo using a smartphone application that applies an automatic beauty filter or skin-smoothing algorithm, you alter the underlying pixel structure. The USCIS algorithms immediately read this as prohibited digital manipulation.
The core mistake applicants make here is treating the digital file and the physical print as interchangeable. They capture a photo within a social media app, save it to their camera roll, and attempt to upload it. The app strips the necessary EXIF data and compresses the color depth, leading to immediate rejection. For parents handling infant applications, checking the United States Baby Passport Photo Guide helps clarify how these strict digital output rules apply when photographing newborns who cannot sit upright or support their own heads.
2. Align Subject Framing with Biometric Nodal Points
Positioning the subject correctly is where the vast majority of application rejections occur. To submit a passport style photo uscis systems will accept, you must satisfy a strict "head-to-image" ratio. Facial recognition algorithms map the distance between specific nodal points: the center of the eyes, the tip of the nose, and the corners of the mouth.

For the algorithm to accurately map these points, the head must be perfectly centered and measure between 1 inch and 1 3/8 inches (25 mm to 35 mm) from the bottom of the chin to the top of the head (the crown). This strict measurement intentionally forces a specific amount of negative space above the head and beside the shoulders.
To achieve this without distorting the facial features, you must back the camera up. Smartphone cameras utilize wide-angle lenses (typically equivalent to a 24mm or 28mm focal length). If you hold the phone two feet away from the subject's face, the lens creates barrel distortion, making the nose appear larger and the ears pull backward. You must step back at least four to five feet from the subject and use a slight optical zoom (2x or 3x) to flatten the perspective.
Practical rule: Leave at least two to three inches of empty space above the subject's head when shooting; you can always crop tighter later in post-processing, but you cannot artificially generate missing background space to meet the ratio.
The most frequent mistake at this stage is framing the subject too tightly during the capture, mimicking how people take selfies. Once imported into a biometric cropping tool, there is simply no background left to fill the required square canvas without chopping off the top of the subject's hair or truncating their shoulders. If you are preparing travel documents for a family holding multiple citizenships, reviewing the US & International Baby Passport Photo Requirements & Guides will demonstrate where these head ratio rules drastically diverge from other countries.
3. Execute the Exact Dimensional Crop
The physical and digital dimensions mandated by the government are entirely unforgiving. When measuring the passport size photo dimensions for us visa applications, you must output a square that is strictly 2 x 2 inches (51 x 51 mm) for physical paper prints.
For digital submissions, the file must measure at least 600 by 600 pixels, up to a maximum of 1200 by 1200 pixels. The cropping process cannot rely on guesswork; it must anchor specifically on the subject's eyes. The eyes must be positioned vertically between 1 1/8 inches and 1 3/8 inches (28 mm to 35 mm) from the bottom edge of the photo.
Mechanically, using a dedicated biometric cropping tool that overlays a transparent measurement grid is the only reliable way to measure this distance accurately on a digital screen. Attempting a freehand crop using standard phone gallery applications usually results in the eyes sitting too low on the canvas or the chin resting directly against the bottom margin. Using a specialized US Baby Passport Photo Maker tool automates this specific chin-to-crown alignment, ensuring the crop happens precisely at the required government coordinates.
The mistake users make here is relying on the generic "Square" ratio preset built into their smartphone camera app. While this successfully crops the image to a 1:1 ratio, it provides absolutely no measurement overlay for the critical chin-to-crown ratio or eye placement. The result is a perfectly square file that systematically fails the biometric head-size test upon upload.
4. Control Lighting Geometry and Background Separation
US visa photos mandate a background that is plain white or off-white, entirely free of shadows, patterns, or secondary light sources. The lighting must be flat, even, and front-facing.
If you position the subject against a wall, they must step forward at least 18 inches away from it. This prevents their body from casting a hard drop shadow directly behind their head. When artificial intelligence systems or validator portals attempt to separate the subject from the background, they look for sharp edge contrast between the person's hair, their clothing, and the wall. If the background is too dark, unevenly lit, or heavily textured, the scanning software cannot find the edge. This results in the system either flagging the background as non-compliant or incorrectly registering the subject's hair as part of the background.
Mechanically, achieving this requires avoiding mixed lighting. Do not mix warm tungsten room lights (which cast an orange hue) with natural daylight from a window (which casts a blue hue). This creates a white balance failure, rendering the subject's skin tone unnatural and triggering a rejection. Stand facing a large window on an overcast day to secure diffused, even light across the entire face. If you struggle with uneven lighting indoors, you can consult the Help Center for diagrams on bouncing natural light to eliminate heavy shadows under the neck and chin.
The most common error is shooting against a bedroom wall painted in a "light color" that isn't actually white - such as pale gray, cream, or eggshell blue - assuming the validator will accept it as close enough. The digital color space validators objectively read the RGB values of the background pixels, and any significant deviation from pure white or off-white results in an automatic system flag.
5. Manage File Compression and the Printing Handoff
Once the image is perfectly cropped, lit, and sized, saving the file and preparing it for print introduces the final set of technical hurdles. The digital image must be exported in JPEG (.jpg) format. However, high compression ratios introduce macroblocking artifacts - pixelated, jagged blocks around the eyes, mouth, and hairline that completely ruin the file's biometric readability.
You must export the image at 100% baseline quality first, and then carefully scale down the physical pixel dimensions (for example, to exactly 600x600 pixels) rather than violently dragging down the JPEG compression quality slider to hit the 240 kB limit. Furthermore, government systems do not accept progressive JPEGs or PNG files; the file must be a baseline standard JPEG.
If your application requires physical photos, the digital file must be laid out onto a standard 4x6 inch photographic paper template at exactly 300 DPI. A 4x6 canvas perfectly holds two 2x2 inch photos side-by-side with room for trimming. The print must be on matte or glossy photo paper. Because digital compression failures and hidden EXIF data errors are notoriously difficult to spot with the naked eye, relying on a service with a 100% Refund Policy provides crucial financial protection if the final print is rejected by a consular officer at your interview.
The mistake that destroys an otherwise perfect photo at this stage is how the file is transferred. Applicants frequently email the photo to themselves or a local pharmacy printer using the "small" or "medium" attachment setting on their mobile device. This action aggressively compresses the image to save bandwidth and strips the file of its critical color profile data, guaranteeing a rejection. Alternatively, handing the file to a photo kiosk that applies an automated "auto-correct" or "borderless printing" function will stretch the 2x2 crop, entirely ruining the meticulously measured chin-to-crown ratio.
Common Pitfalls & Troubleshooting
Troubleshooting visa photo rejections requires identifying exactly which part of the technical specification failed. These distinct errors often look identical to a frustrated applicant but demand completely different corrections.
Symptom: The online validator returns a "Background is heavily compressed or altered" error.
- Cause: This is the most frequent real cause of digital rejection. You utilized a generic background replacement or removal tool that left jagged, unnatural pixel artifacts around the hairline, or you saved the final JPEG using an aggressive compression setting to shrink the file size. This creates visible macroblocking artifacts on what should be a perfectly smooth white background.
- Fix: Abandon the edited file and return to the original, unedited photo. Use an uncompressed file transfer method to move it to a desktop computer, and utilize a professional AI tool designed specifically for biometric extraction rather than a generic social media photo editor.
Symptom: The subject's head appears subtly distorted, swollen, or "bulging" in the center.
- Cause: The photograph was captured too close to the subject using a standard smartphone wide-angle lens. Lenses with short focal lengths inherently stretch and distort three-dimensional objects situated close to the glass, warping the biometric distances between the nose and ears.
- Fix: Step back a minimum of four feet from the subject. Use the telephoto lens setting (typically labeled as 2x or 3x optical zoom) on your mobile device to compress and flatten the perspective before taking the shot.
Symptom: The physical 2x2 inch print cuts off the top of the subject's hair or the bottom of their chin.
- Cause: The original digital file was sized correctly, but it was printed at a commercial kiosk that defaulted to "auto-fill" or "borderless printing" to fit the image entirely across a 4x6 sheet of paper. This adds an unrequested, destructive secondary crop.
- Fix: When submitting the file for physical printing, instruct the technician to turn off all auto-enhancements, auto-cropping, and borderless printing options. The file must be printed at exactly 100% scale.
Symptom: The digital upload is rejected for "unnatural skin tones" or poor exposure.
- Cause: Your smartphone screen brightness was manually turned up to maximum when reviewing the photo, masking the reality that the underlying file was severely underexposed. Alternatively, mixed lighting (window light combined with a warm lamp) confused the camera's white balance.
- Fix: Turn off all interior room lights and rely exclusively on indirect sunlight from a window. Check the digital file's exposure histogram before printing to ensure the mid-tones are properly elevated.
FAQ
Can I wear my prescription glasses in a US visa photo? No. The US Department of State banned all eyeglasses in visa and passport photos in 2016 to prevent glare and frame obstruction of the eyes. The only exception is a rare, documented medical reason (such as recent ocular surgery), which requires a signed statement from a medical professional.
Is it permissible to smile in the photograph? You must maintain a neutral facial expression with both eyes open and your mouth closed. A slight, natural resting face is acceptable, but a broad smile that parts the lips or squints the eyes will fail the facial recognition scan.
How recent must the visa photo be? The photo must have been taken within the last six months. Immigration systems cross-reference uploads; if you submit a photo that was previously used on a passport issued a year ago, the system will flag the chronological discrepancy and reject the application.
Do infants need to have their eyes entirely open for the photo? Generally, yes. However, the Department of State makes slight practical allowances for newborns and very young infants, accepting that it is difficult to keep their eyes perfectly open or their heads entirely straight. The physical layout, background color, and lack of hands/parents in the frame remain strictly enforced.
Are headphones or wireless earbuds permitted? No. You must remove all headphones, wireless earbuds, and similar devices. Your ears should be visible, though hair covering the ears is generally acceptable provided the hair does not obscure any portion of the face or cast shadows on the cheeks.