How To Take An AI Passport Photo At Home In 2026
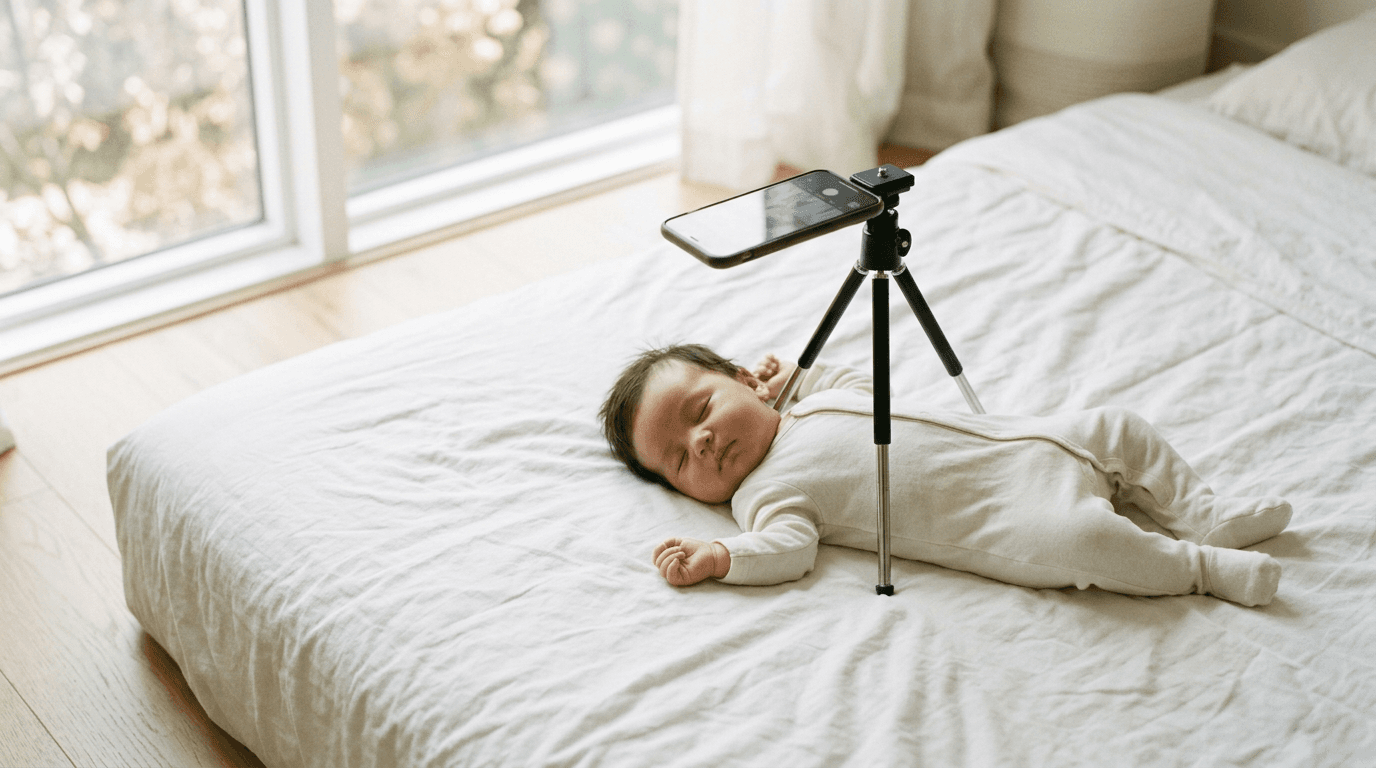
Picture the scene: you are standing in a crowded local pharmacy, holding a squirming four-month-old under harsh fluorescent lights, while a clerk tries to time a digital camera shot between tears. By the fifth attempt, the baby is crying, the clerk is frustrated, and the resulting image is almost guaranteed to fail the State Department's strict biometric geometry checks. In 2026, the alternative is generating an ai passport photo at home. Relying on software to format the final image file allows you to capture the raw picture in a familiar, quiet environment, precisely when the infant is rested and cooperative.
Quick Summary
Capturing an infant's passport photo at home requires separating the raw camera capture from the final biometric formatting. By securing flat, natural lighting and aligning the smartphone parallel to the child's face, parents can record a compliant base image that software later processes into exact legal dimensions.
- Use indirect window light to prevent asymmetrical facial shadows.
- Keep the camera parallel to the face to avoid optical jaw distortion.
- Support the infant with hidden towels rather than adult hands.
- Process the raw file through automated software to manage background replacement.
Table of Contents
- Why an ai passport photo solves the infant photography problem
- 1. Preparing the lighting environment
- 2. Positioning the smartphone camera
- 3. Posing the infant safely
- 4. Processing the raw image file
- Common Pitfalls & Troubleshooting
- FAQ
- Recommended Reads
Why an ai passport photo solves the infant photography problem
A government agency rejects a passport application when the submitted image fails specific geometric and lighting algorithms. For adults, standing completely still against a white wall for a post office clerk is straightforward. For an infant who cannot support their own neck weight, the physical mechanics of a retail photo session almost always violate compliance rules. When an adult steps into the shot to hold the baby, the adult's hands or clothing invariably enter the frame. When overhead retail store lights shine down on a reclined infant, they cast heavy shadows under the chin and nose, which facial recognition scanners interpret as structural deformities.
Using algorithmic processing fundamentally shifts the burden of compliance. You capture a well-lit, front-facing image using your smartphone camera, and the software handles the background removal, the edge masking, and the precise chin-to-crown cropping required by the destination country. This separation of capture and formatting is exactly what makes home photography viable. To do this successfully, however, you must format the environment specifically for the camera sensor, ensuring the raw file meets United States baby passport photo standards before the software even touches it.
1. Preparing the lighting environment
Eliminating mixed color temperatures prevents sensor failure
The most frequent reason biometric images fail is uneven lighting. Passports require flat, shadowless illumination across the entire face. When a sharp shadow falls across half of a cheek, the automated systems used by border control cannot accurately measure the distance between the eyes, nose, and chin.
To achieve this continuous light at home without studio strobes, you must use indirect natural daylight. Place a white sheet or blanket flat on the floor near a large window, ensuring the sun is not shining directly onto the fabric. The light should be bright but entirely diffused. Position the baby so the top of their head points parallel to the window glass, rather than having their feet point toward it. This parallel orientation allows the natural light to wash across the face evenly from the side, filling in the eye sockets without causing the child to squint.
The critical mistake people make in this step is mixing light sources. If you place the baby near a window but leave the warm yellow ceiling lights on in the bedroom, you introduce two conflicting color temperatures - typically 5500 Kelvin from the sun and 2700 Kelvin from the bulb. The smartphone camera sensor will struggle to set a correct white balance across the frame, resulting in skin tones that look artificially blue on the window side and severely orange on the room side. Turn off every artificial light in the room before you begin. If the window light alone is not bright enough, you must wait for a different time of day. Software cannot salvage a file compromised by mixed lighting without heavily degrading the image data.
2. Positioning the smartphone camera
Matching the lens plane to the facial plane prevents distortion
When capturing a passport photo with phone hardware, the physical lens introduces severe optical distortion if positioned incorrectly. Modern smartphone main lenses are relatively wide. If you bring the phone too close to the subject in an attempt to fill the frame, the center of the image bulges outward. This barrel distortion makes the infant's nose appear unnaturally large and forces the ears to recede out of view, structurally invalidating the biometric proportions required by the state.
To prevent this facial distortion, you must rely on optical zoom rather than physical proximity. Stand further back - at least four feet away - and use the 2x or 3x telephoto lens setting on your phone interface. This physical distance compresses the background and flattens the facial features into their true geometric proportions.
Practical rule: Keep the physical back of the smartphone exactly parallel to the plane of the infant's face, never tilted up or down.
The failure mode in this step occurs when parents shoot downward at a tilted angle. If the baby is lying flat on the floor and you lean over them, your natural physiological tendency is to angle the top of the phone downward toward the floor. This tilts the focal plane. In the resulting captured image, the child's forehead appears disproportionately large, and the jawline recedes sharply. To fix this structural error, squat down lower and hold the phone completely flat, mirroring the exact angle of the floor. The center of the lens cluster should align precisely with the bridge of the baby's nose.
3. Posing the infant safely

Keeping adult hands out of the frame guarantees independence
A government agency will immediately reject any image that features a second person. This requirement is why attempting a passport photo selfie guarantees a rejection for infants; holding the child in one arm while turning the front-facing camera on yourself inevitably captures your shoulder, your clothing, or your hands supporting their neck. Furthermore, adult arm length is too short to reach the distance required for optical flatness, creating a severe fish-eye effect. The child must appear entirely unsupported and alone in the frame.
The mechanics of achieving this separation depend strictly on the infant's age. For newborns who lack the muscle control to sit up, lying them flat on a plain white or off-white sheet on the floor is the only viable method. Roll two small hand towels and place them directly under the sheet on either side of the baby's head. This creates a subtle physical cradle that keeps their head from rolling left or right, maintaining the required straight-on gaze without visible restraint. Ensure the towels are completely hidden beneath the fabric.
For older infants who can sit but remain unsteady, drape the white sheet heavily over a car seat or a rigid high chair. Secure the child in the seat, ensuring the safety straps are pulled down and completely out of the visible frame around the neck.
The most frequent mistake here is leaving an adult hand in the frame just behind the baby's shoulder to prop them upright. Even if the hand is heavily shadowed, slightly out of focus, or barely visible in the corner, algorithmic scanners detect the human skin tone and flag the image for manual review, which almost always ends in rejection. If the child will not stay still in the structured environment, you must wait until they are calmer rather than forcing the pose with physical intervention.
4. Processing the raw image file
Relying on biometric software handles the dimensional math
Once you possess a raw image that is brightly lit, optically distortion-free, and features only the unsupported infant, you must format that file to exact legal dimensions. Do not attempt to manually crop the image using a standard photo gallery application. The State Department requires the absolute head size - measured from the bottom of the chin to the top of the head, including any hair - to sit precisely between 1 inch and 1 3/8 inches within a strict 2x2 inch square. Other nations require completely different proportions, as seen in United Kingdom baby passport photo standards, which mandate a 35x45 millimeter layout.
This is the exact moment you process the file through dedicated biometric software. When you take passport photo on phone applications without software assistance, you are guessing at these millimeters. Automated systems use artificial intelligence models to map the distinct facial landmarks. The system identifies the exact pixel row for the chin and the crown, scales the raw image mathematically to fit the mandatory ratio, and verifies the horizontal eye alignment.
Furthermore, the software executes complex background replacement. Even if you used a relatively clean white sheet, natural fabric wrinkles and slight body shadows will appear in the background of the raw file. The processing algorithm isolates the infant's silhouette and replaces the textured background with a pure, uniform white or off-white color value.
The fatal mistake users make at this processing stage is pre-cropping the photo before uploading it. If you trim the margins of the raw image on your phone to remove the edge of the floor, you restrict the software's ability to center the face properly. Always upload the full, unedited original file. The system requires that extra peripheral margin space to shift the subject up, down, or sideways to achieve the correct final alignment. Familiarizing yourself with policies addressing rejected passport applications often reveals that pre-cropping is the leading cause of formatting errors.
Common Pitfalls & Troubleshooting
Even with a highly controlled environment, taking compliant photos of infants introduces unpredictable variables. When a submitted file fails early biometric compliance checks, the cause is almost always one of the following distinct failures. Recognizing the visual symptom allows you to apply the correct technical fix.
The Closed or Sleepy Eye Rejection Symptom: The baby's eyes appear partially closed, or one eye is open significantly wider than the other in the final processed image. Diagnosis: Infants possess poor muscle control over their eyelids. While some government agencies are lenient with newborns keeping their eyes completely open, partially closed eyes or asymmetrical squinting often trigger automatic border control rejections because the iris cannot be scanned. Fix: Do not use a camera flash to get their attention, as this causes an immediate startle reflex and prolonged squinting. Instead, hold a high-contrast toy right next to the smartphone lens. Capture the photo in rapid burst mode during the one or two seconds their eyes lock onto the object.
The Artificial Background Bleed Symptom: The biometric software aggressively cuts off wisps of hair, or leaves a halo of jagged gray shadow around the baby's ears after attempting to replace the background. Diagnosis: The original sheet background was poorly lit, or the baby was placed too close to a background that cast a heavy, dense shadow. The masking algorithm could not mathematically distinguish the edge of dark hair from the dark shadow beneath it. Fix: Increase the lighting contrast before capturing the image. Ensure the sheet beneath the baby is as brightly lit as the baby's face. If the hair still blends into the fabric, adjust your angle so the natural window light hits the hair directly, creating a slight physical highlight that the software edge-detection can recognize.
The Off-Center Gaze Symptom: The baby's face is pointed directly at the lens, but their pupils are looking sharply off to the side of the frame. Diagnosis: The parent taking the photo was talking to the baby but holding the phone down at their chest, or a second person was standing beside the camera trying to distract the child. The baby looked at the noise source rather than the lens. Fix: The infant's gaze must run completely parallel to their face angle. Hide your own face directly behind the phone. If a second person is helping, they must stand immediately behind you, never to the side, ensuring the baby's eye line travels straight into the camera lens. Reviewing troubleshooting technical failures during image upload confirms this off-center gaze is the most frequent real cause of an otherwise perfect image failing government compliance.
FAQ
Can I use a pacifier to calm the baby during the photo? No. A pacifier physically covers a significant portion of the mouth, the lower cheeks, and the chin. Border authorities require full visibility of the entire lower face to map the jawline accurately against their databases. The mouth must be entirely visible, and ideally closed, though slight parting is typically accepted for infants under one year old.
Do the baby's ears need to be completely visible? It depends entirely on the hairstyle and the specific destination country's rules, but generally, hair should not obscure the facial structure. For infants with longer hair, tucking it behind the ears is strongly recommended. You must not use headbands, decorative bows, or hats to hold the hair back, as these are legally classified as head coverings and will result in an automatic rejection.
What if my baby refuses to look straight at the camera? You must wait for them to calm down or try again later. There is no software fix for a turned head. If the processing software detects that one ear is significantly closer to the lens than the other, or that the tip of the nose is breaking the silhouette of the cheek, the facial geometry is rendered invalid. Try capturing the image again immediately after a nap.
How do I know if the lighting is bright enough for the software? Check the raw image before uploading it. If the image appears grainy, noisy, or pixelated when you zoom in heavily on the baby's eyes, the camera sensor did not receive enough ambient light and artificially increased its ISO to compensate. This artificial noise degrades the biometric data and ruins the edge detection. You need a brighter window, not a stronger interior room light.