How to Use a Passport Photo Template for Compliant Prints at Home
The U.S. Department of State rejects thousands of travel applications weekly before a human ever reviews the paperwork, and the failure point is almost entirely algorithmic. A shadow under the jawline, a digitally smoothed cheek, or a head size measuring three millimeters too large will trigger an automatic failure in the government's biometric scanning system. While many applicants assume they must visit a commercial photography studio to clear this hurdle, routing a smartphone image through a digital passport photo template and formatting it for a retail lab is a highly precise, repeatable process. Controlling the initial capture environment and understanding how automated sizing tools assemble a compliant print sheet removes the guesswork from the application entirely.
Quick Summary
Generating a compliant travel document image requires precise alignment of facial biometrics onto a standard 2x2-inch grid before sending the formatted file to a local print lab. By controlling the initial capture lighting, utilizing automated biometric sizing software, and adhering to strict physical print resolutions, applicants can produce government-ready photographs at home.
- Even, diffuse ambient light eliminates directional shadows that cause algorithmic rejections.
- A dedicated alignment grid enforces the mandatory 1-to-1.375-inch chin-to-crown measurement.
- Positioning two identical images onto a 4x6 canvas prevents retail print kiosks from aggressively cropping the file.
- Physical prints must utilize dye-sublimation technology on matte or glossy photo stock rather than standard inkjet paper.
Table of Contents
- The Geometry of an Automatic Rejection
- 1. Flattening the Ambient Lighting
- 2. Establishing the Chin-to-Crown Ratio
- 3. Centering the Face onto the Canvas
- 4. Building the Retail Print Canvas
- 5. Selecting the Final Output Medium
- Common Pitfalls & Troubleshooting
- FAQ
- Recommended Reads
The Geometry of an Automatic Rejection
The modern passport adjudication process relies heavily on facial recognition software to establish a baseline biometric record. This software maps a specific geometric matrix across the applicant's face: it calculates the exact distance between the pupils, the angle of the nose down to the upper lip, and the width of the jawline. If the submitted image is not mapped to a strict vertical and horizontal layout, the software cannot lock onto these landmarks, causing the application to bounce back to the applicant with a generic compliance warning. Understanding the strict international baby passport photo requirements and adult biometric standards reveals that building a compliant file is a matter of mathematics rather than photography.
1. Flattening the Ambient Lighting
Directional Shadows Distort Facial Landmarks
Biometric edge-detection algorithms read dark shadows as physical structural features. A harsh shadow cast by an overhead desk lamp down the side of a nose reads to the scanner as a facial asymmetry, triggering an immediate failure. Standard indoor lighting also presents a secondary risk: mixed color temperatures. Combining a warm, orange-tinted tungsten ceiling light with the cool, blue-tinted light coming from a television or computer screen causes the camera's white balance sensor to panic, resulting in heavily distorted skin tones that fail visual inspection.
To capture a flat, compliant image, you must eliminate directional light sources entirely. The most reliable method at home relies on indirect window light. Positioning the subject facing a large window on an overcast day provides a massive, diffuse light source that wraps evenly around the face, illuminating both eyes equally and erasing the shadow beneath the chin. When photographing an infant, standing directly over them while they lie on a white poster board near a sliding glass door provides this exact lighting scenario. The mistake most applicants make is engaging the smartphone's flash to compensate for a dim room. A direct flash creates a harsh, localized hot-spot on the forehead and casts a dense black drop-shadow onto the background directly behind the head, virtually guaranteeing an application denial.
2. Establishing the Chin-to-Crown Ratio
Hair Volume Throws Off Scale Calculations
The defining metric of a U.S. travel document is the vertical head size. Within the standard 2x2 inch physical photograph, the subject's head must measure exactly between 1 inch and 1 3/8 inches from the bottom of the chin to the top of the head. If the head occupies too much or too little of the frame, the automated scanner cannot scale the pupillary distance accurately. Trying to manually pinch-to-zoom a raw image to hit this exact fraction of an inch on a smartphone screen inevitably results in scaling errors.
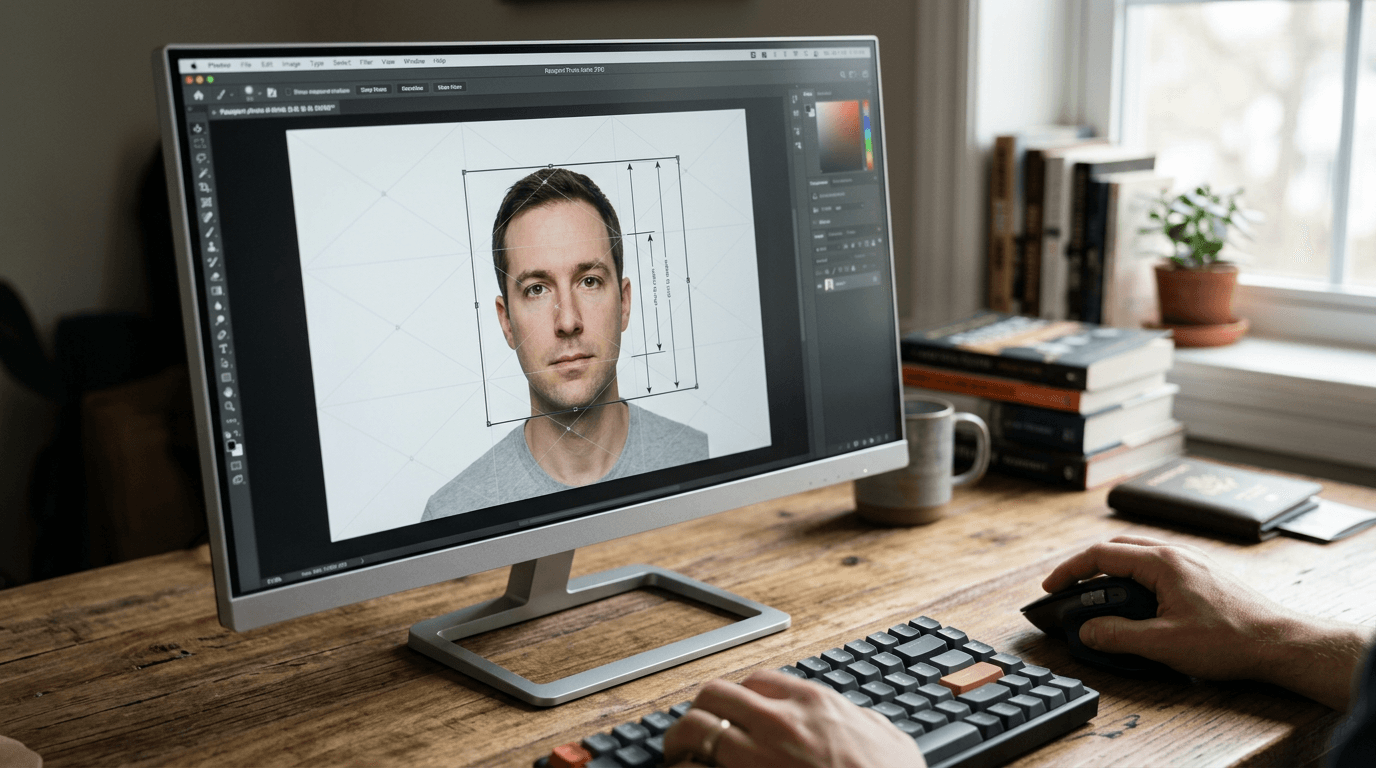
Automated layout software enforces this ratio mathematically. By uploading the raw capture into an alignment tool, the system projects a fixed, non-negotiable grid over the face. This is particularly vital when dealing with a moving subject; as outlined in any dedicated United States baby passport photo guide, attempting to manually measure the shifting head-to-body ratio of a squirming infant against a ruler is an exercise in frustration. The digital overlay anchors the chin to the lower bounding line and scales the rest of the image upward automatically.
Practical rule: Always measure the head from the bottom of the fleshy chin to the top of the actual skull bone, ignoring the volume of fluffy or styled hair entirely.
3. Centering the Face onto the Canvas
Asymmetrical Alignment Flags Digital Audits
Once the head size is locked, the image must be positioned on the X and Y axes. The vertical center line of the photograph must run perfectly down the bridge of the nose. Furthermore, the subject's eyes must sit squarely between 1 1/8 inches and 1 3/8 inches from the bottom edge of the physical print. When you attempt to manually crop photo for us passport requirements using a phone's built-in photo gallery app, you are guessing at these coordinates, often resulting in an image where the subject appears to lean slightly out of frame.
Using a dedicated software environment eliminates this alignment risk. An automated us passport photo cropper reads the pupillary distance and digitally shifts the entire canvas until the bridge of the nose aligns with the absolute center pixel of the 600x600 resolution box. Different nations enforce drastically different centering rules; a Canada baby passport photo guide details a 50x70mm requirement with entirely different eye-height thresholds, proving that generic square cropping tools cannot accommodate global border standards. The common failure point here is a tilted head. A subject tilting their head slightly to the left might fit cleanly inside the bounding box, but the asymmetrical eye line will fail the horizontal symmetry test during the final audit.
4. Building the Retail Print Canvas

Kiosks Stretch Raw Files to Fit Default Margins
Retail pharmacies and local print shops do not stock 2x2 inch photo paper. Their machines are calibrated to print standard consumer photograph sizes, primarily 4x6 inches. Therefore, generating a digital passport photo print out requires placing two perfectly scaled 2x2 inch squares side-by-side onto a larger 4x6 digital layout, leaving a wide margin of blank white space around the images.
If an applicant simply sends a single 600x600 pixel digital square to a pharmacy kiosk and requests a print, the kiosk software will attempt to fill the 4x6 physical paper. It will stretch the square file horizontally and vertically, hopelessly distorting the facial biometrics and rendering the image useless. You must assemble the file at exactly 300 Dots Per Inch (DPI) so the final canvas measures exactly 1200 by 1800 pixels. This guarantees that when the lab technician hits print, the machine renders the 2x2 inserts at their true physical size, allowing the applicant to cleanly cut them out at home without touching the facial borders.
5. Selecting the Final Output Medium
Inkjet Dot Patterns Fail Micro-Text Scans
A compliant us passport photo print must survive the physical lamination process used to build the travel book and remain clearly legible for ten years. The Department of State explicitly mandates photo-quality paper, specifying either standard matte or glossy finishes. Home office laser printers and standard inkjet printers do not meet this standard, regardless of the paper type loaded into the tray.
Home inkjet printers create images by spraying microscopic dots of wet cyan, magenta, yellow, and black ink onto the page. Under the intense heat of the agency's lamination machines, these microscopic dots can bleed, blurring the sharp contrast of the iris and pupil. Retail photo labs utilize dye-sublimation printers, a thermal process that fuses solid, continuous ribbons of color directly into the chemical coating of the photo paper. This continuous-tone printing method resists fading and heat distortion. Applications printed on standard cardstock or textured matte paper will be rejected at the counter. Recognizing this strict physical tolerance is why reliable layout platforms back their formatted digital files with a strict 100% refund policy if the resulting print fails government inspection due to sizing or resolution errors.
Common Pitfalls & Troubleshooting
Even with a perfect digital layout, the final transition from screen to print can introduce subtle errors that ruin the application. The most common failures look identical from the outside - an application returned in the mail - but stem from entirely different root causes.
- The Fit-to-Page Distortion:
- Symptom: The printed head measures wider than 1.4 inches across, or the top of the hair is clipped entirely off the paper.
- Fix: The retail print kiosk applied an automatic "fit to page" or "borderless" crop to your 4x6 file. You must explicitly select "print actual size" or "no crop" in the kiosk software settings before finalizing the order.
- The Gray Background Rejection:
- Symptom: The passport agency rejects the photo, citing that the background is not plain white or off-white. The printed background appears as a muddy, textured gray.
- Fix: Your smartphone camera aggressively metered the bright window light and underexposed the white wall behind the subject. You must use a software tool to isolate the subject and replace the background layer with pure hexadecimal
#FFFFFFwhite before printing.
- Digital Alteration Flags:
- Symptom: A seemingly perfectly lit, perfectly cropped photograph is rejected for "unnatural appearance" or "digital alteration."
- Fix: The state department utilizes deep-fake detection algorithms that easily spot smartphone beauty filters. Never apply red-eye reduction, skin-smoothing algorithms, or blemish removers. If the subject has red eye from a flash, you must reshoot the photograph entirely using natural light.
- Floating Head Syndrome:
- Symptom: The bottom of the printed image cuts off immediately at the jawline, leaving a floating head with no visible neck or shoulders.
- Fix: The original photograph was framed far too tightly during capture. When using a layout tool, ensure the original raw capture frames the subject down to the middle of the chest, providing the software enough raw visual data to build the lower third of the required 2x2 square. If you need assistance determining the proper chest crop line, consult a dedicated help center for visual examples of raw capture framing.
FAQ
Why did the print kiosk cut off the outer edges of my 4x6 template file? Commercial photo printers build in a 2-3 millimeter "bleed" margin, slightly zooming in on the image to ensure the ink reaches the physical edge of the paper. A properly formatted 4x6 layout leaves plenty of white space between the outer edge of the paper and the inner 2x2 squares, ensuring the bleed margin never touches the biometric photo area.
Does an infant's mouth need to be completely closed in the picture? No. The U.S. State Department grants specific leniency for infants and toddlers under the age of one. While adult applications will be rejected for an open mouth or exaggerated smile, infants are permitted to have relaxed expressions and partially open mouths, provided they are looking generally toward the camera.
Can I use standard printer paper if I have a high-end color laser printer? No. The application guidelines strictly mandate photo-quality paper. Standard copy paper, regardless of the printer's resolution quality, lacks the chemical coating necessary to survive the intense thermal lamination process used to bind the final passport book.
How do I verify the 300 DPI requirement before printing my layout? Right-click the formatted digital file on your computer and select "Properties" or "Get Info." Under the image details, verify that the total pixel dimensions measure exactly 1200 pixels by 1800 pixels. If the file is significantly smaller, the print lab will aggressively upscale the image, causing severe pixelation around the eyes.