Passport Photo What to Wear: The Complete 2026 Preparation Guide
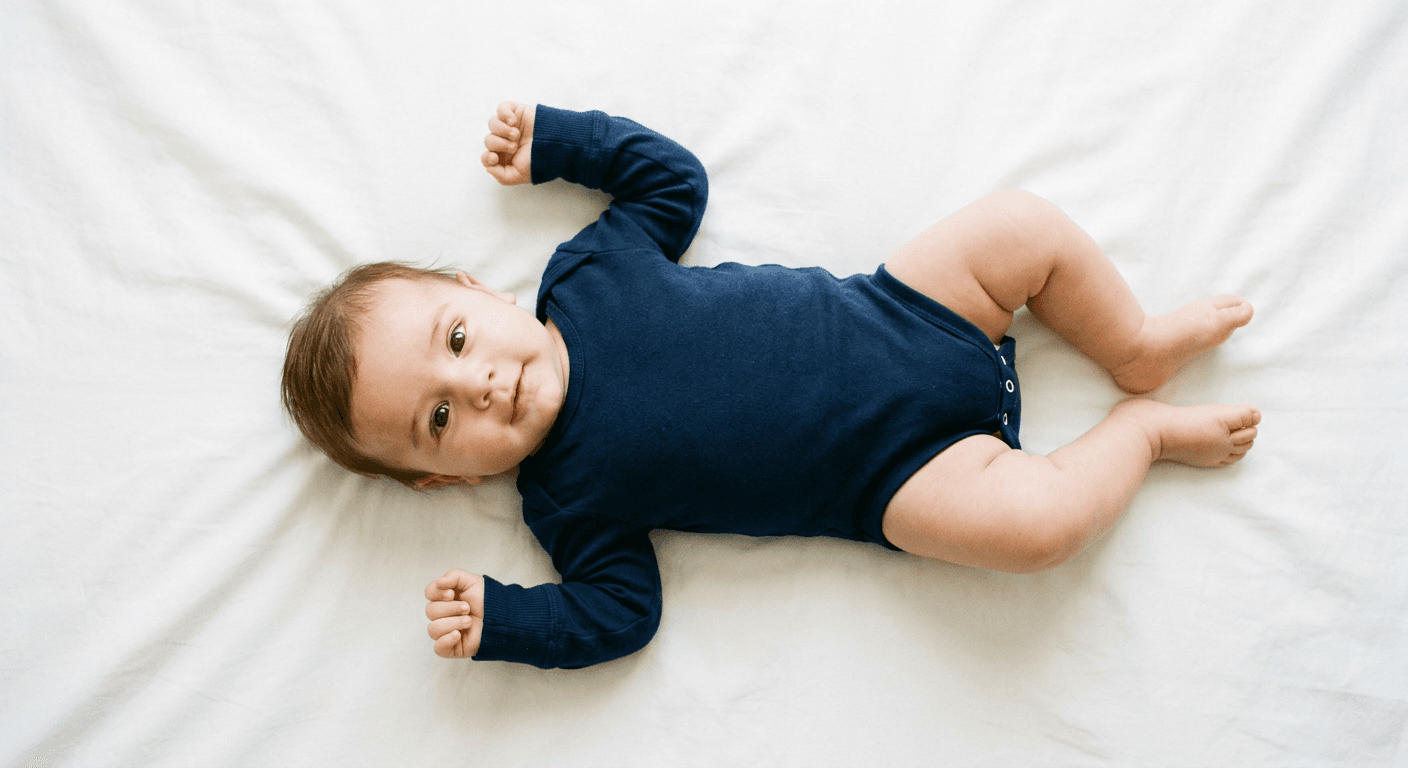
Most applicants assume a biometric application rejection stems from a bad facial expression. In reality, the algorithms scanning your image are rarely judging your mood; they are measuring pure geometry. They must find the exact boundary where your shoulders end and locate the precise center of your pupils. Figuring out your passport photo what to wear strategy is a strict technical requirement, not a fashion choice. When a scanner cannot read the separation between your shirt and the background, or detects a shadow that alters your jawline, it immediately flags the file for manual review. Fixing these contrast and lighting issues after the fact using digital manipulation will trigger an entirely separate rejection for file tampering. You must capture the physical reality perfectly on the first attempt. Before committing to a setup, reviewing specific US and international infant passport photo requirements ensures you build the right staging area from the start.
Quick Summary
Preparing for a biometric application image requires creating stark visual contrast, ensuring completely unobstructed facial geometry, and utilizing flat, even lighting. Automated verification systems routinely fail applications when shadows mimic facial features or when clothing blends directly into the mandatory background color.
- Wear dark, solid colors to explicitly define your shoulder line.
- Remove all spectacles entirely, including clear prescription lenses.
- Pin hair completely behind the shoulders to expose the structural jawline.
- Use diffused ambient window light to eliminate dark background drop shadows.
Table of Contents
- How your passport photo what to wear choice triggers automated rejection
- 1. Create stark contrast against the required background
- 2. Eliminate all facial obstructions completely
- 3. Expose the structural edges of your jaw and temples
- 4. Master flat lighting to prevent biometric misreads
- 5. Secure infants safely without introducing artifacts
- Common Pitfalls & Troubleshooting
- FAQ
- Recommended Reads
How your passport photo what to wear choice triggers automated rejection
Biometric verification relies heavily on isolation. To confirm head sizing requirements - typically demanding the head measure between 1 and 1 3/8 inches from the bottom of the chin to the top of the head - the software must first separate the human subject from the environment behind them. This requires hard, undeniable edges. The system maps the outline of the shoulders, tracks up the neck, and measures the width of the face. Your clothing choices dictate how easily the system can perform this initial extraction. Utilizing platforms backed by a 100% refund policy for compliance rejections allows applicants to test their images through compliance algorithms before finalizing physical prints.
1. Create stark contrast against the required background
The foundation of a compliant image is the physical boundary between the applicant and the wall behind them. Government cropping tools look for a horizontal line intersecting the vertical plane of the neck to establish where the shoulders rest.
Why a passport photo white shirt triggers cropping failures
The United States strictly mandates a plain white or off-white background. A passport photo white shirt blends seamlessly into that exact required backdrop. When the cropping algorithm scans the image, it encounters a continuous field of white from the wall straight down into the chest. The software reads this as a "floating head" anomaly, returning a "subject not isolated" error code.
The physical mechanics of light exacerbate this failure. Even if your white top is a slightly different shade than the wall, a camera's flash or bright window light will expose both surfaces similarly, erasing any subtle shadow separating the fabric from the background. Highly reflective materials, such as silk or synthetic athletic wear, behave the same way by bouncing light directly back into the lens and blowing out the exposure on your chest.
Practical rule: Wear a solid dark color - navy, charcoal gray, or black - crafted from a matte fabric like cotton to guarantee a sharp, unreadable border between your shoulders and the wall.
The most frequent mistake applicants make here is choosing a top with a high collar, such as a turtleneck or a thick winter scarf. Even if the garment is dark, bringing fabric up to the chin hides the anatomical separation of the neck. Choose a standard crew neck or v-neck to leave the entire neck visible.
2. Eliminate all facial obstructions completely
Facial recognition software uses the center of your pupils as the primary anchor point for every subsequent measurement. The distance between the pupils, and the geometric angle from the pupils down to the tip of the nose, act as your unique biometric fingerprint.
The definitive rule on a passport photo with or without glasses
The US State Department permanently banned all eyewear in 2016. There is no longer a debate over taking a passport photo with or without glasses - they must be removed entirely. The optics of curved glass dictate this rule. Corrective lenses refract ambient light, which artificially magnifies or shrinks the visible size of the iris. Furthermore, any direct light source will bounce off the glass, creating an opaque white glare that acts as a dead pixel zone directly over the pupil.
The mistake applicants make is assuming anti-reflective coatings or thin wire frames provide a workaround. Anti-reflective coatings often cast a green or purple tint over the skin when photographed, which triggers color-alteration rejections. Thick frames cast hard shadows onto the cheekbones, mimicking the deep-set shadows of entirely different facial structures.
If you cannot safely remove your eyewear for medical reasons, you cannot simply submit the image and hope for the best. You must obtain a signed statement from a medical professional specifically detailing a recent ocular surgery or condition that makes removal dangerous, and even then, the frames cannot obscure the pupil center.
3. Expose the structural edges of your jaw and temples
The width of your face is the secondary anchor point for identity verification. To measure this accurately, the software must trace the unbroken line from the temple, down the cheekbone, to the point of the chin.
Why the confusion about passport photo ears persists
Applicants frequently waste time trying to pin their hair into uncomfortable styles based on a misunderstanding of the rules regarding passport photo ears. The formal requirement states that the "full face must be visible." It does not explicitly demand that the cartilage of both ears be exposed. However, hair that falls over the ears almost universally drapes over the sides of the jawline and the cheeks as well.
Tucking your hair firmly behind your ears is simply the most reliable mechanical method to ensure your cheekbones and jawline are fully exposed. The mistake people make is focusing solely on the ears while allowing long bangs to sweep across the forehead. Bangs that touch the eyebrows introduce shadows into the eye sockets, which disrupts the pupil measurement discussed in the previous section. Use basic bobby pins to secure loose fringe above the brow line, and brush all remaining hair over the back of the shoulders rather than letting it drape down the chest.
4. Master flat lighting to prevent biometric misreads
Lighting dictates the perceived shape of the object being photographed. In portraiture, photographers use directional light to create shadows that define and flatter the face. In biometric imaging, those same shadows destroy data.
Erasing drop shadows that mimic facial asymmetry
If a light source shines exclusively from the left side of the room, the nose will cast a shadow over the right cheek. To an algorithm analyzing a flat, two-dimensional image file, that shadow reads as physical mass. It makes the nose appear asymmetrical and the right cheek look severely sunken. You must achieve flat, even lighting that illuminates both sides of the face equally.
The simplest way to achieve this is to stand directly facing a large window on an overcast day. Cloud cover acts as a massive natural diffuser, scattering the light so it wraps around the face without creating hard edges.
The fatal mistake applicants make here is standing directly against the wall. The inverse square law of light dictates that placing an object flush against a surface creates a harsh, defined drop shadow directly behind it. To fix this, you must physically separate yourself from the background. Step 18 to 24 inches away from the wall. This distance allows the shadow cast by your body to fall toward the floor, dropping below the bottom edge of the camera's frame entirely.
5. Secure infants safely without introducing artifacts
Photographing a child under twelve months old presents a severe mechanical challenge: they cannot support the weight of their own heads. Attempting to prop them up introduces foreign objects into the frame, which instantly violates compliance regulations.
Keeping adult hands and props out of the final frame
The system expects to see exactly one human subject. When handling infants, relying on the definitive United States baby passport photo guide helps parents navigate the strict prohibition against adult hands in the image. If a parent attempts to hold the baby upright, a stray thumb on the infant's shoulder or a hand bracing the back of the neck will be detected as a foreign artifact.
The correct mechanical approach relies on gravity. Lay the infant entirely flat on the floor atop a smooth, plain white sheet. This position allows the chin to fall back naturally, exposing the neck. If the infant's head rolls to the side, roll up two small hand towels and place them under the sheet on either side of the head to create a subtle channel that keeps the face pointed straight up at the lens.
Many countries utilize different sizing standards, such as those detailed in the Canada baby passport photo guide, which requires a 50x70 mm format rather than the standard 2x2 inch square. Regardless of the final print dimensions, the raw capture must be entirely free of pacifiers, head bows, or the textured edges of a car seat.
Common Pitfalls & Troubleshooting
Before applying these general passport photo tips, check your raw image for these specific, highly common failure modes. Each requires a distinct mechanical adjustment to fix.
1. The Halo Effect (Background Shadowing)
- Symptom: A dark, crescent-shaped shadow appears on one side of the head or directly behind the shoulders, destroying the stark background contrast.
- Fix: You are standing too close to the wall. Step at least 18 inches forward. If the wall behind you now appears gray instead of white due to the light falloff, introduce a secondary light source - like a small lamp - pointing exclusively at the wall behind you, completely avoiding your body.
2. Lens Distortion (The Narrow Face)
- Symptom: The subject's nose looks disproportionately large, or the ears are completely hidden entirely behind the cheeks, causing the head to look excessively narrow and stretched.
- Fix: You took a selfie. Smartphone front-facing lenses are wide-angle, which aggressively distorts facial geometry when held at arm's length. Switch to the primary rear-facing camera. Have another person stand at least four feet away and use a slight optical zoom to compress the facial features back to their true anatomical proportions.
3. Red Eye and Skin Flash-Bounce
- Symptom: The pupils contain harsh red dots, or the forehead and cheeks feature blown-out white circles of pure glare.
- Fix: Disable the camera's direct flash. Direct flash creates a specular highlight on oily skin and reflects off the retina. You must rely solely on ambient, diffused room lighting or window light.
4. Digital Smoothing and Alteration
- Symptom: The final print lacks visible skin pores or texture, leading to a rejection for "Digital Alteration" despite following all lighting rules.
- Fix: Turn off all native smartphone "beauty filters" before opening the camera app. Modern phones automatically apply skin-smoothing algorithms by default. These tools erase the micro-contrast that biometric scanners use to verify that the image is an authentic photograph of a real person. If you repeatedly encounter digital alteration rejection codes, consulting a dedicated troubleshooting and help center provides diagnostic steps for overriding native phone processing.
FAQ
Can I wear makeup in my official application image? Yes, but you must avoid heavy contouring. Contouring artificially reshapes your bone structure by painting on shadows that do not physically exist. Biometric scanners rely on natural shadows to map the depth of your eye sockets and cheekbones. Keep makeup limited to your daily baseline.
Are uniforms allowed in the image? No. The US strictly forbids military, law enforcement, or any specialized work uniforms. Camouflage patterns of any color are universally rejected. You must wear plain, everyday clothing. Religious attire worn daily is the only permitted exception.
Does a baby need to have their eyes fully open? Infants under 12 months are granted slight leniency. While their eyes do not need to be wide open, they should ideally be looking toward the lens. If the infant is asleep, you must wait until they are awake; closed eyes are rejected even for newborns.
What happens if my digital file is under the required resolution? The system will reject it for pixelation. When printing the file physically, the image must contain enough digital data to render clearly at 300 DPI for a 2x2 inch square. Always capture the image at your camera's highest resolution setting and avoid compressing the file by texting it to yourself.
Can I wear a head covering for religious purposes? Yes, provided you submit a signed statement verifying that the head covering is recognized as customary or required by your religion, and is worn daily in public. The covering cannot cast any shadows over the face, and the full face from the hairline to the chin must remain completely visible.